After planting up my tomatoes in a "Quadgrow" system, I realised just how easy one of these things should be to make and save myself the best part of 40 quid in the process! So, without further ado, this is what I did...
I got a storage crate with a lid and drilled two 30mm diameter holes in the top:
I did two because that's how many of the buckets I plant in that I could fit on top of the crate lid; you can obviously drill holes for however many plant pots that you can fit on. Then I drilled the same size holes into the bottom of the buckets.
Next you will need a piece of capillary matting for each pot. Cut this to a length that will reach from the base of your plant, down through the pot and into the crate, reaching the bottom.
Slice a bit off the bottom section like so:
Thread a piece of matting, pointy end first, down through the hole in the pot and poke it out of the bottom:
It needs to come up through the pot high enough to wrap around the plant that you are going to be putting in.
Next, fill the pot with soil to the level that you are going to add to your plant, leaving the capillary matting poking out like this:
Add the plant and wrap the capillary matting around its soil and roots:
Then top up the rest of the pot with soil:
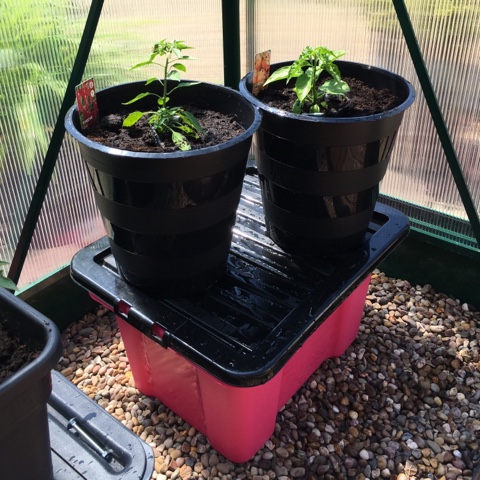
Fill your storage crate with water and place the lid on top. Place your pot onto the lid and line up the hole in the pot with the hole in the crate. Feed the capillary matting down through the hole in the crate lid, making sure that the matting goes down into the water:
Repeat these steps for the other pot (or for however many pots you are going to do) then water around the base of the plant, just to get the matting damp and started off.
And that is it! The roots will grow in and around the matting and the capillary action will continue to keep the plants supplied with water, just so long as you remembering to top up the water tank now and again...
NOTE: if you wish to add a fertiliser to the water, I suggest you empty the tank before you do so. If you keep topping up with water, then with fertiliser etc, your ratios will be all over the place and you could end up over/under feeding. Emptying the tank and starting again with a fresh mix, will avoid this problem.
Now you can go away for the weekend and not have to pester your relatives or neighbours to water your plants!
Happy growing :-) x